AI agents are getting smarter, and businesses are using them to connect to real tools, databases, and workflows. But some of that power comes with a serious question: how do you keep it all secure?
This is where Model Context Protocol comes in. Learning how to build a secure local MCP server is becoming an essential skill for any team that deploys an AI agent.
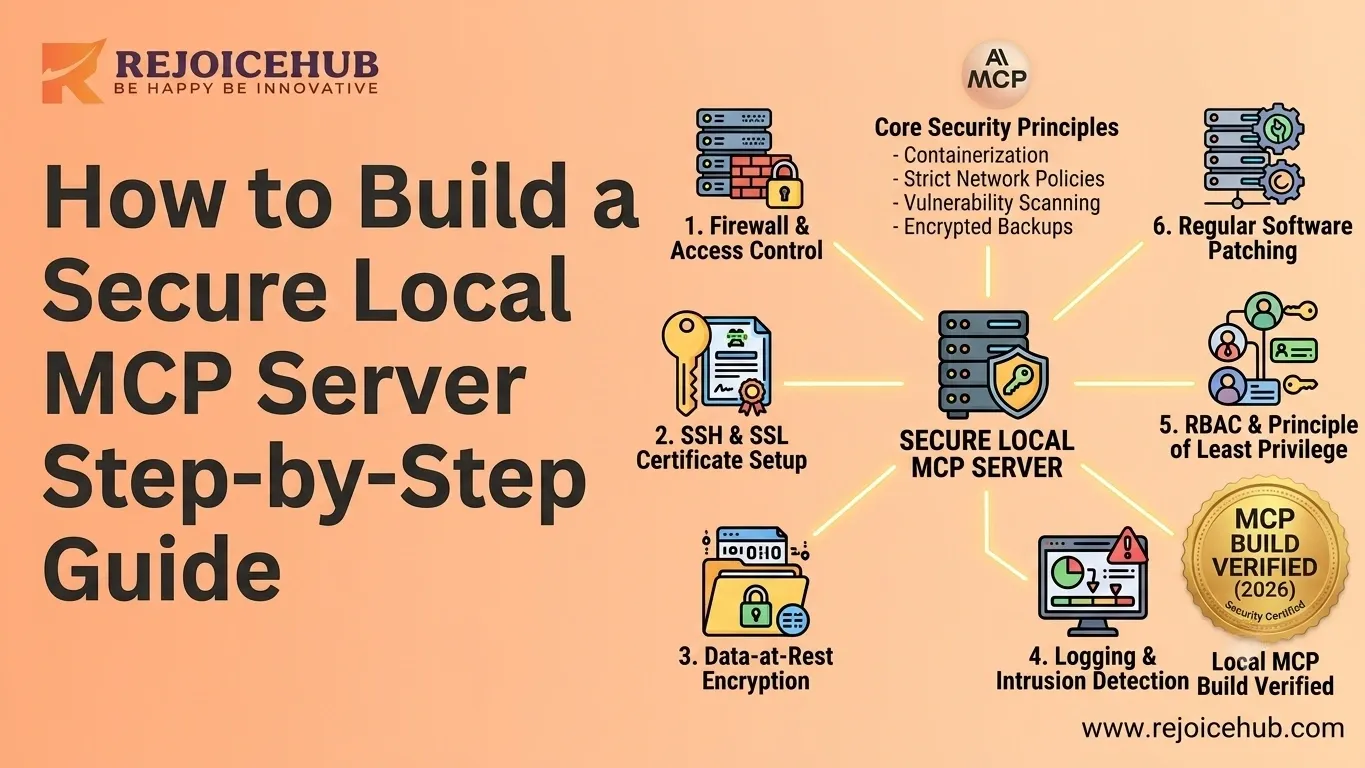
In this guide, you'll get a step-by-step breakdown of how to design and set up a local MCP server with security built in from day one not as an afterthought.
What Is an MCP Server and Why Does Security Matter?
Understanding Model Context Protocol
MCP stands for Model Context Protocol and is an open protocol that makes it possible for any AI model such as Claude, GPT, or any other custom AI agent to interface with external services, tools, APIs, and databases in a reliable manner.
Think of it as a universal translator between your AI agent and all the tools it needs to interact with: any kind of API, database, tool, or workflow.
MCP servers define:
- What tools are available (e.g., "search CRM," "send email," "query database")
- How inputs and outputs are structured (schemas, validation)
- How AI clients connect and make requests
Without MCP, every AI integration is a custom one-off. With MCP, you get a standardized layer that's reusable, auditable, and when done right secure.
Security Risks in MCP Servers
Here's the part most tutorials skip: MCP servers are a high-value attack surface.
By connecting an AI agent to a tool through MCP, you are granting it access to perform actions in the real world. This means a poorly configured MCP server can put your organization at risk of:
- Unauthorized Access: If your server lacks proper authentication, any actor on the network could call your MCP endpoints and trigger actions no AI required.
- Data Exposure: MCP servers often sit between AI agents and sensitive systems (CRMs, databases, internal APIs). A misconfiguration can expose data you never intended to share.
- Prompt Injection Attacks: Malicious users can craft inputs that manipulate the AI's behavior through the MCP tool responses a growing attack vector unique to AI-connected systems.
- Privilege Escalation: If MCP tools run with excessive permissions, an attacker exploiting one tool could gain access far beyond what's needed.
Bottom line: MCP security isn't optional. It's foundational.
Planning Your Secure Local MCP Environment
Before writing a single line of code, get your environment right. Rushing setup is the #1 reason teams end up with insecure deployments.
Hardware and Software Requirements
You don't need enterprise hardware to run a secure local MCP server. Here's what's needed:
| Requirement | Recommendation |
|---|---|
| Operating System | macOS 13+, Ubuntu 22.04+, or Windows 11 with WSL2 |
| Runtime | Node.js 18+ or Python 3.10+ |
| Package Manager | npm / pip / uv |
| Dev Tools | VS Code, Git, Postman, or Bruno (API testing) |
| Terminal | iTerm2 (Mac), Windows Terminal, or default Linux terminal |
| RAM | 8GB minimum, 16GB recommended for multi-agent setups |
For most small-to-mid-sized teams, a modern laptop or a dedicated local server handles MCP deployments with ease.
Security Prerequisites
Set the following firewall rules before making your MCP server live:
Firewall Rules Limit incoming traffic on your MCP port (by default 3000 or customized) to only known IP addresses, usually localhost or an internal network IP range.
bash
Example: Allow only localhost on port 3000 (Ubuntu/ufw)
sudo ufw allow from 127.0.0.1 to any port 3000 sudo ufw deny 3000
User Permissions Create a dedicated non-root service user to run your MCP server. Never run as root.
bash sudo useradd -r -s /bin/false mcpuser
Secure Networking Even locally, plan for TLS from the start. Use mkcert for local HTTPS certificates so your development setup mirrors production.
Step-by-Step Guide to Create an MCP Server
Let's build it. This walkthrough uses the official MCP TypeScript SDK the most widely supported and production-tested option.
Step 1 – Install Required Tools
First, make sure your environment is ready.
bash
Check Node.js version (must be 18+)
node --version
Install the MCP SDK globally
npm install -g @modelcontextprotocol/sdk
Create your project directory
mkdir secure-mcp-server && cd secure-mcp-server npm init -y
Install core dependencies
npm install @modelcontextprotocol/sdk dotenv zod npm install --save-dev typescript ts-node @types/node
Initialize TypeScript: bash npx tsc --init
Set strict: true in your tsconfig.json. This catches type errors early and prevents entire categories of security bugs.
Step 2 – Create MCP Server Structure
Organized projects are more secure projects. Use this structure:
secure-mcp-server/ ├── src/ │ ├── server.ts # Main MCP server │ ├── tools/ # Tool definitions │ │ ├── search.ts │ │ └── database.ts │ ├── middleware/ # Auth, logging, validation │ │ ├── auth.ts │ │ └── logger.ts │ └── config/ │ └── index.ts # Environment config ├── .env # Secrets (never commit this) ├── .env.example # Template for team members ├── .gitignore └── package.json
Add .env to .gitignore` immediately:
bash echo ".env" >> .gitignore
Create your .env file:
MCP_PORT=3000 API_SECRET_KEY=your-strong-random-key-here NODE_ENV=development LOG_LEVEL=info
Step 3 – Configure MCP Endpoints
Here's a minimal, secure MCP server in src/server.ts:
typescript import { Server } from "@modelcontextprotocol/sdk/server/index.js"; import { StdioServerTransport } from "@modelcontextprotocol/sdk/server/stdio.js"; import { CallToolRequestSchema, ListToolsRequestSchema } from "@modelcontextprotocol/sdk/types.js"; import { z } from "zod"; import dotenv from "dotenv";
dotenv.config();
// Input validation schema (Zod) const SearchInputSchema = z.object({ query: z.string().min(1).max(500), limit: z.number().int().min(1).max(50).default(10), });
const server = new Server( { name: "secure-local-mcp", version: "1.0.0" }, { capabilities: { tools: {} } } );
// Register tools server.setRequestHandler(ListToolsRequestSchema, async () => ({ tools: [ { name: "search_database", description: "Search the internal database", inputSchema: { type: "object", properties: { query: { type: "string", description: "Search query" }, limit: { type: "number", description: "Max results (1-50)" }, }, required: ["query"], }, }, ], }));
// Handle tool calls with validation server.setRequestHandler(CallToolRequestSchema, async (request) => { if (request.params.name === "search_database") { // Validate and sanitize inputs const parsed = SearchInputSchema.safeParse(request.params.arguments); if (!parsed.success) { throw new Error(Invalid input: ${parsed.error.message}); }
const { query, limit } = parsed.data;

// Your business logic here
const results = await searchDatabase(query, limit);
return {content: [{ type: "text", text: JSON.stringify(results) }] };
}
throw new Error(Unknown tool: ${request.params.name}); });
async function main() { const transport = new StdioServerTransport(); await server.connect(transport); console.log("Secure MCP Server running"); }
main().catch(console.error);
Key security elements baked into this code:
- Input validation with Zod: Every tool call is validated before it touches your logic
- Schema-based tool registration: AI clients know exactly what's expected
- Error handling: No raw stack traces exposed to clients
Accelerate Your Workflows with Custom AI
Book a free consultation session with RejoiceHub. We'll map out a tailored automation roadmap for your company.
Step 4 – Connect AI Clients
Claude Desktop
Edit your Claude Desktop config at ~/Library/Application Support/Claude/claude_desktop_config.json (macOS):
json { "mcpServers": { "secure-local-mcp": { "command": "node", "args": ["/absolute/path/to/secure-mcp-server/dist/server.js"], "env": { "API_SECRET_KEY": "your-key-here" } } } }
Cursor IDE
Add to .cursor/mcp.json` in your project root:
json { "mcpServers": { "secure-local-mcp": { "command": "npx", "args": ["ts-node", "src/server.ts"] } } }
Custom AI Agents
For programmatic clients using agentic AI workflows, connect via the MCP SDK client:
typescript import { Client } from "@modelcontextprotocol/sdk/client/index.js"; import { StdioClientTransport } from "@modelcontextprotocol/sdk/client/stdio.js";
const client = new Client({ name: "my-agent", version: "1.0.0" }, {}); const transport = new StdioClientTransport({ command: "node", args: ["dist/server.js"], }); await client.connect(transport);
Step 5 – Test Functionality
Never deploy without testing. Use the MCP Inspector, the official debugging tool:
bash npx @modelcontextprotocol/inspector node dist/server.js
This opens a browser UI where you can:
- Browse available tools
- Send test requests with custom inputs
- Inspect raw request/response payloads
- Verify error handling behavior
Run a quick health check:
bash
Test that your server responds correctly
echo '{"jsonrpc":"2.0","id":1,"method":"tools/list"}' | node dist/server.js
If you're building MCP integrations for a production AI product, RejoiceHub offers end-to-end AI agent development from architecture design to secure deployment.
MCP Server Security Best Practices
Your server is running. Now lock it down.
Authentication and Authorization
API Keys (simple, effective for local/internal use)
typescript // middleware/auth.ts export function validateApiKey(providedKey: string): boolean { const expectedKey = process.env.API_SECRET_KEY; if (!expectedKey) throw new Error("API key not configured");
// Use timing-safe comparison to prevent timing attacks const crypto = require("crypto"); return crypto.timingSafeEqual( Buffer.from(providedKey), Buffer.from(expectedKey) ); }
OAuth 2.0 (for multi-user or enterprise deployments)
Use an established OAuth library like passport.js or Auth0. Never roll your own auth logic.
Token Validation Checklist:
- Validate token on every request, not just connection
- Set short expiry times (15–60 minutes for access tokens)
- Implement token rotation for long-lived sessions
- Log all authentication failures
Encryption and Secure Communication
Always Use HTTPS/TLS Even Locally
Install mkcert for trusted local certificates:
bash
Install mkcert
brew install mkcert # macOS mkcert -install mkcert localhost 127.0.0.1
You now have localhost.pem and localhost-key.pem
Configure your server to use them:
typescript import https from "https"; import fs from "fs";
const tlsOptions = { key: fs.readFileSync("localhost-key.pem"), cert: fs.readFileSync("localhost.pem"), };
https.createServer(tlsOptions, app).listen(3443);
For HTTP transports: enforce TLS 1.2 minimum. Disable TLS 1.0 and 1.1 entirely.
Logging and Monitoring
Audit Trail Basics
Log every tool invocation with:
typescript // middleware/logger.ts export function logToolCall(toolName: string, input: unknown, userId?: string) { const entry = { timestamp: new Date().toISOString(), tool: toolName, userId: userId ?? "anonymous", inputHash: hash(JSON.stringify(input)), // Don't log raw sensitive inputs }; console.log(JSON.stringify(entry)); }
What to Log:
- Every tool call (name, timestamp, user)
- Authentication failures (with IP, timestamp)
- Validation errors (potential probe/attack attempts)
- Server errors and unexpected behaviors
What NOT to Log:
- Raw passwords, API keys, or secrets
- Full PII (names, emails, SSNs) in plain text
- Sensitive query content (hash it instead)
Threat Detection Set up rate limiting to catch abuse. Understanding how generative AI can be used in cybersecurity can also help you design smarter threat response strategies.
bash npm install express-rate-limit
typescript import rateLimit from "express-rate-limit";
const limiter = rateLimit({ windowMs: 60 * 1000, // 1 minute max: 100, // 100 requests per minute per IP message: "Too many requests", });
Common MCP Server Security Mistakes to Avoid
Learn from others' mistakes before they become yours.
Running as Root or Admin: This is the fastest way to turn a small vulnerability into a full system compromise. Always use a dedicated low-privilege service account. If your MCP process is exploited, the blast radius stays contained.
Open Network Ports: Binding your MCP server to 0.0.0.0 exposes it to your entire network (or beyond). Unless you need external access, always bind to 127.0.0.1 only.
Don't do this: typescript server.listen(3000, "0.0.0.0");
Do this instead: typescript server.listen(3000, "127.0.0.1");
-
Hardcoded Credentials: Credentials hardcoded in your source code find their way into Git history, log files, and ultimately breach reports. Use environment variables. Rotate credentials regularly. Use a secrets manager solution (HashiCorp Vault, AWS Secrets Manager) in production.
-
No Activity Logging: Without logs you will not be able to monitor what your AI agent is actually doing. If (not "when") there is an issue, log files are the only way to understand what went wrong and when.
-
Excessive Permissions: MCP services should require the least set of permissions needed to work. The search tool does not need write permissions. The reporting service does not need permission to delete records. Teams deploying AI agents for business automation should treat least-privilege access as a non-negotiable baseline.
Local vs Cloud MCP Servers: Which Is More Secure?
This is the question every team faces when planning their MCP deployment. Here's an honest comparison:
| Factor | Local MCP Server | Cloud MCP Server |
|---|---|---|
| Data Privacy | Data never leaves your network | Data transits to/from cloud |
| Control | Full control over environment | Shared responsibility model |
| Compliance | Easier for HIPAA, SOC 2, GDPR | Requires vendor compliance review |
| Attack Surface | Smaller, isolated to local network | Exposed to internet by design |
| Scalability | Limited by local hardware | Scales on demand |
| Maintenance | Your team manages updates/patches | Provider handles infrastructure |
| Cost | Low (existing hardware) | Ongoing subscription/usage fees |
| Uptime | Depends on your local infra | SLA-backed availability |
| Setup Complexity | Higher initial setup | Faster to get started |
| Disaster Recovery | Manual backups required | Built-in redundancy options |
For teams evaluating broader AI agent infrastructure decisions, the local vs. cloud tradeoff often comes down to your compliance requirements and the sensitivity of the data your agents touch.
Conclusion
Building a secure local MCP server is about far more than configuring infrastructure it is about creating a trustworthy foundation for enterprise AI. As AI agents continue to transform business operations and gain access to sensitive systems, security must be embedded into every layer of the architecture.
Implementing strong authentication, encryption, least-privilege access, comprehensive input validation, and detailed audit logging from the beginning significantly reduces risk while improving long-term reliability.
Ultimately, the right deployment strategy depends on your organization's needs. Local MCP servers provide greater control for regulated or sensitive environments, while cloud deployments offer flexibility and scalability. Whichever path you choose, the security principles covered in this guide apply equally to both.
Frequently Asked Questions
1. What is an MCP server, and why does it matter for AI agents?
An MCP server acts like a bridge between your AI agent and real tools like databases, APIs, or workflows. It gives AI a structured, reliable way to take actions. Without it, every AI integration is built from scratch, messy, hard to manage, and risky to secure.
2. How do I start building a secure local MCP server from scratch?
Start by installing Node.js 18+ and the official MCP TypeScript SDK. Set up your project folder, create a .env file for secrets, and never commit it to Git. Then build your server using input validation, proper error handling, and a dedicated non-root service user from the beginning.
3. What are the biggest MCP server security risks I should know about?
The top risks include unauthorized access from missing authentication, data exposure through misconfigured endpoints, prompt injection attacks, and privilege escalation. These aren't edge cases; they're common in real deployments. MCP server security needs to be planned before you write your first line of code.
4. What tools do I need to follow this step-by-step guide to create an MCP server?
You need Node.js 18+, npm, the MCP TypeScript SDK, Zod for input validation, and dotenv for environment config. For testing, use the MCP Inspector tool. A code editor like VS Code and a basic terminal setup are all you need to get started locally.
5. Should I run my MCP server locally or on the cloud?
If you work with sensitive or regulated data, a local MCP server gives you full control and better compliance with standards like HIPAA or GDPR. Cloud setups scale better but come with shared responsibility. Many teams run sensitive tools locally and keep less critical ones in the cloud.
6. How do I add authentication to my local MCP server?
The simplest way is API key validation using a timing-safe comparison to avoid timing attacks. For multi-user setups, use OAuth 2.0 with a library like passport.js. Always validate tokens on every request, set short expiry times, and log every failed authentication attempt for security monitoring.
7. What common mistakes make a local MCP server insecure?
The most common mistakes are running the server as root, binding it to 0.0.0.0 instead of 127.0.0.1, hardcoding credentials in source files, skipping activity logging, and giving MCP tools more permissions than they actually need. Each of these mistakes alone can turn a small issue into a serious security breach.